Thursday, August 19, 2010

Using a Brayer, Technique 2, with Clare

Out came my brayer again yesterday and here is another technique I have found on my voyage of discovery! It is another form of resist technique but this time using your Versamark pad or pen. Hands up now, how many of you have a Versamark pen and have never used it? I thought so!


Step 1: As always glossy card stock is a must and my first step was to tear out a hill shaped mask.

Step 2: Put you mask in place onto the cardstock and then use your Versamark pen to make small dots or snowflakes.

Step 3: Ink up your brayer and then brayer over your cardstock/mask. The more you roll the brayer the better ink coverage you seem to get!

Step 4: Remove the mask and leave your snowy background scene to dry.

Step 5: Create a card or ATC using the brayered scene.

Above are 2 cards I have made using the Versamark resist technique. The multicoloured paisley one was created in the same way but this time I inked up the stamp using my Versamark pad and then the brayer was inked up with a Kaleidacolor ink pad.

As an extra step when stamping a sentiment using the same technique, you can create a shadow effect by then stamping the image again with a black pad but slightly offset the stamp to create the shadow!

This is great Clare, thank you!

Friday, August 13, 2010

Prisma Colour Pencils & Baby Oil with Roberta

Roberta from Prarie Fairy has kindly given me permission to use her tutorial on Prisma Colour pencils. I thought it would be useful for those of us who are still learning with these pencils. Roberta reccommends Baby Oil instead of Sansador, it's cheaper too!

Be sure to pop over to Robertas blog HERE

COLORED PENCIL TUTORIAL

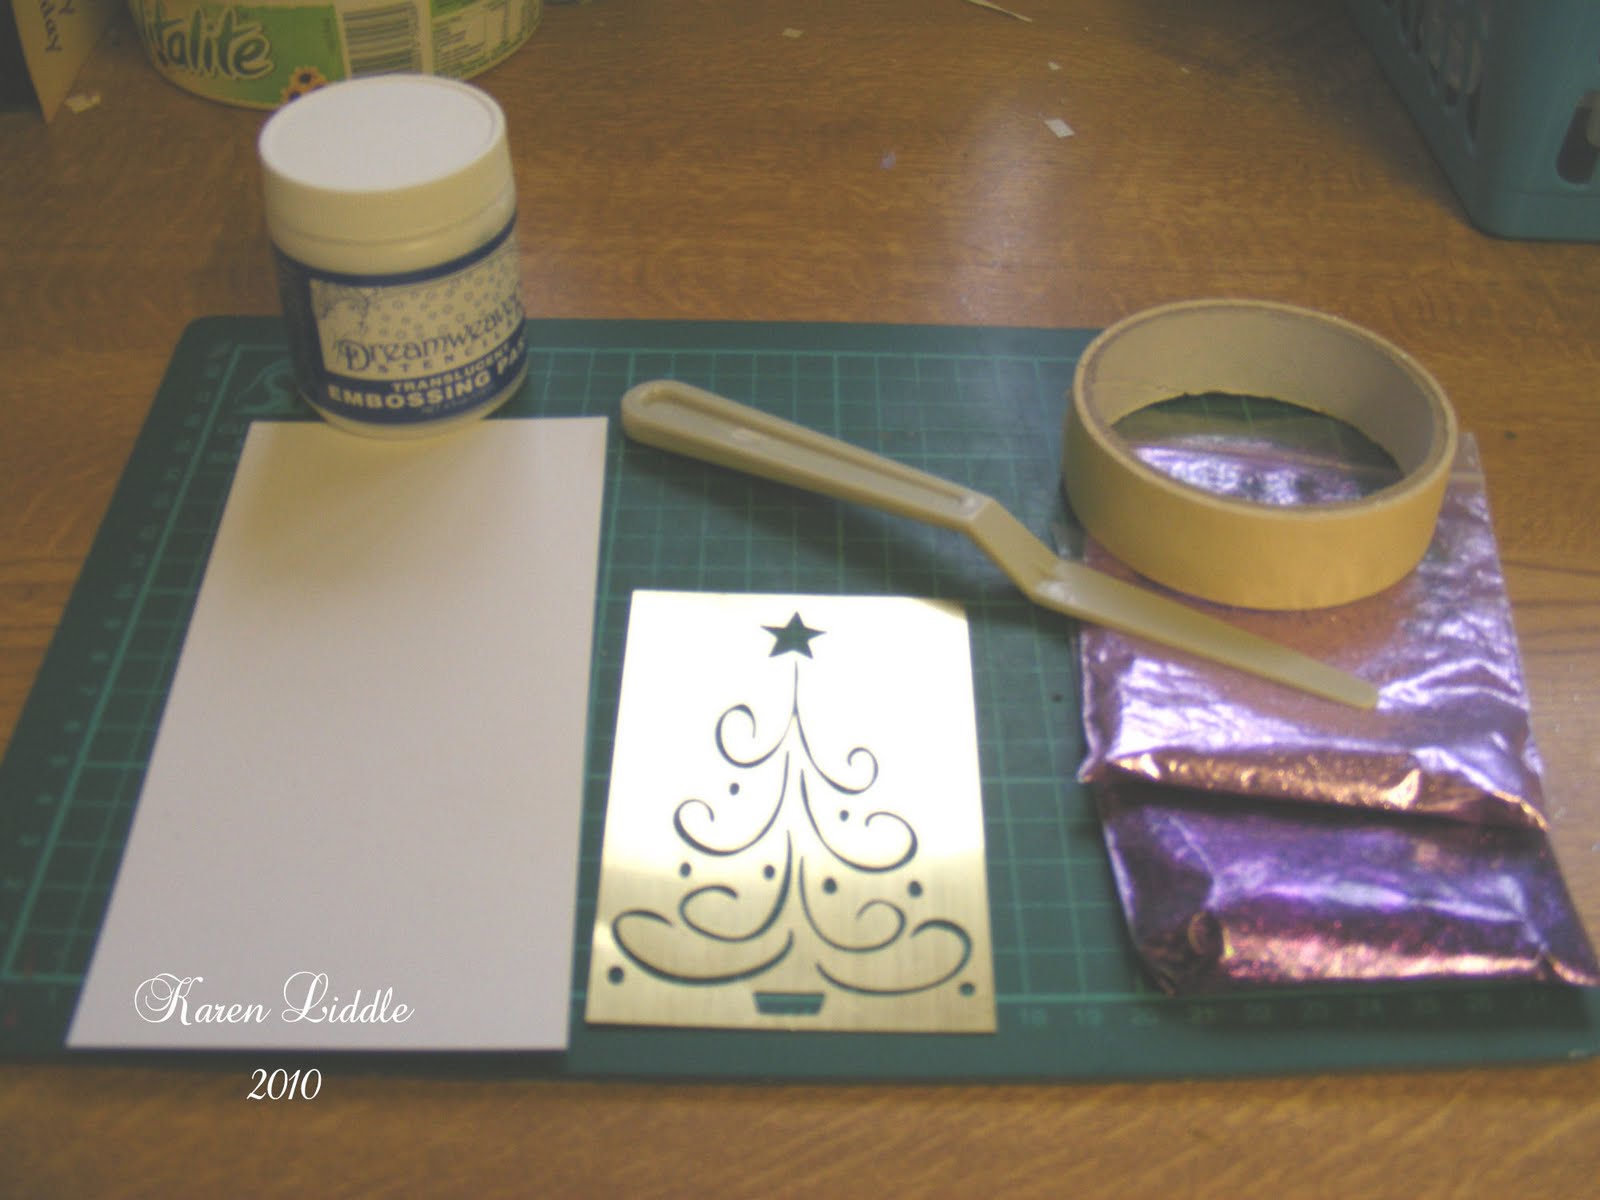
Here is a list of some supplies you will find useful for using wax based pencil crayons. From left to right is as follows:

solvent based blender pen

colorless pencil for burnishing

blending stumps

tourtillions (different type of stump)

erasers at top soft and firm

sharpeners at bottom

extender for holding small leftover pencils

Other supplies for blending you will want to consider are gamsol, odorless mineral spirits or baby oil. In the tutorial I use baby oil, my fave by far! Use the blending stumps with these to create soft watercolor like effects.

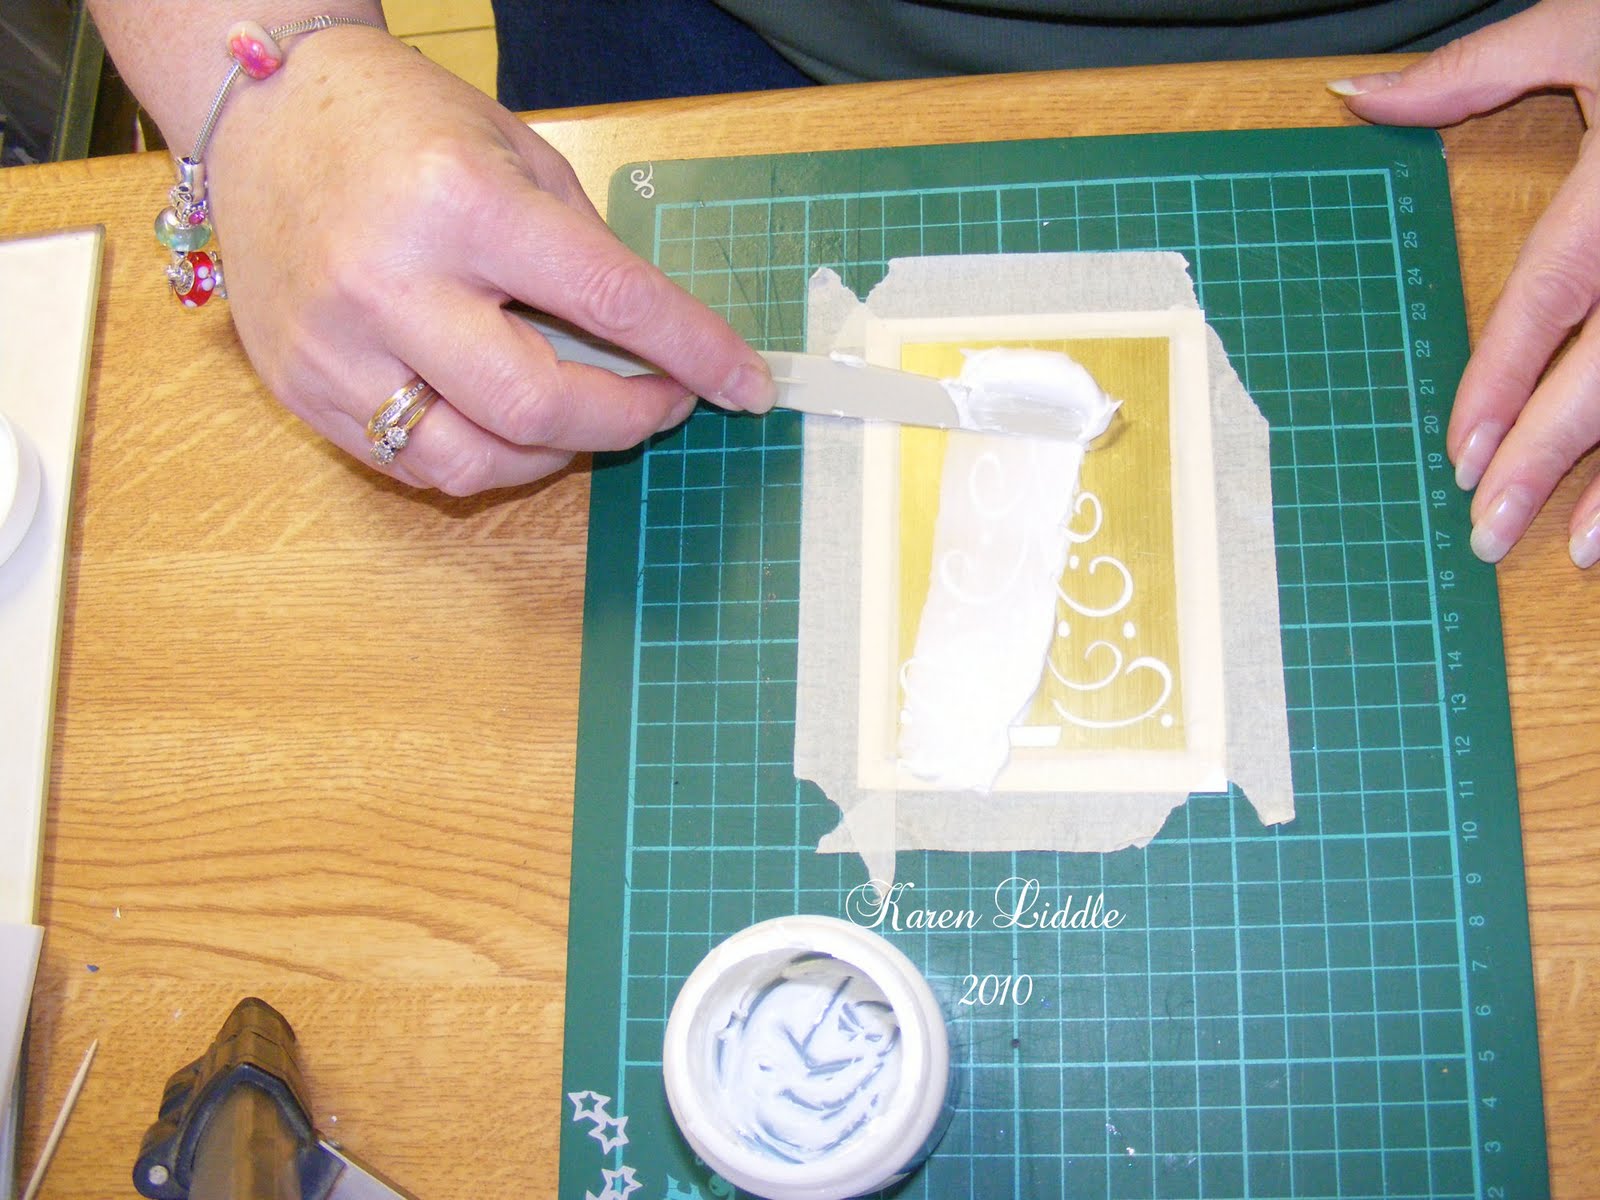
I put sponges in a jar with the baby oil and then just squish the blending stump into it.

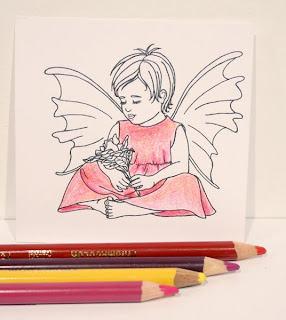
This is the fairy after I have put a soft layer of pink all over her dress. I then use some yellow in the warmer areas where there may me some light hitting the dress. I use red in the deeper colored areas. All applications are a soft layering application. In the darkest areas I use a purple to cool it off and deepen the shadows a little.

I then use the blending stump and baby oil to rub the penciled areas to “melt” the crayon and create a soft water colored effect. I decided after I had blended it to deepen the shadows further with a little more red and a darker purple. You can do this, keep layering and blending. I love being able to do that without damaging the paper. When you use a blending pen you can damage the surface of the paper though so take it easy.


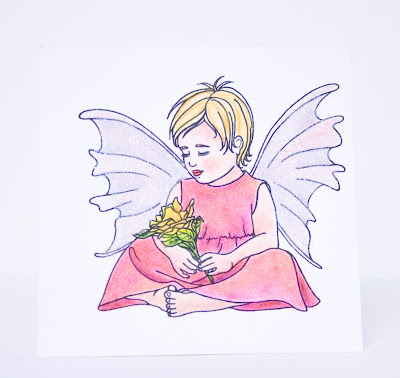
And here is the finished fairy. Even though I used the baby oil my glue pen still works for adding glitter to the wings. Have fun layering colors to create new ones. You are save combining colors as long as you use colors next to each other on the color wheel. Eg. Use purple to cool down a red because red & blue make purple so purple is next to red on the color wheel. So is orange so you use orange or yellow to warm up red.

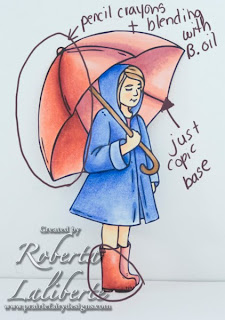
In this picture I have taken an image that I colored with copics. My colors are very limited with my copics so I added some pencil crayon shading over top and blended it with the stump and baby oil to smooth out the look and punch up the vibrance. I am sure you can tell in the picture the circled areas are where I added the colored pencil. I also did the same to her raincoat.

I hope this helps too, so if you have a little accident with blending your copics as they can be so fussy here is a little trick to fix it up.

Oh yeah, had a good question. I use ctmh daisy white cardstock. Stampin Up whisper white is fine too. There are expensive rough papers for colored pencil techniques but if you are looking for a nice smooth copic marker look you want smooth paper. The trick is to buy GOOD QUALITY white cardstock. Don’t cheap out here. You want it to be at LEAST 80lbs with good sizing. Sizing is something they coat the paper with to give it a nice smooth surface so that pigments don’t soak in to quickly. If your paper is cheap anything you put on it will soak right in and look uneven. Cheap paper feels rough and looks rough. Good paper is smooth with a nice sheen to it. Digital images print better on them and have smoother edges. On cheap paper the image looks rough or burred.

I hope you liked the tutorial and you decide to try having some fun with colored pencils. Baby oil even works well with Laurention colored pencils.

COLORED PENCIL AND BABY OIL TUTORIAL

This is my preferred method for coloring images. I also prefer baby oil to gamsol. Gamsol is alcohol based and can tear the paper if you over work the paper. The baby oil emulsifies the colored pencils and makes it possible for you to go back over time and time again to build rich layers. I have not had any trouble using gel pens over them either.

You will need good quality colored pencils, I like prismacolor premiers.

A small jar with sponges and baby oil in it just to soak the sponge so that your blending stups don’t get too much oil on them. (Excess oil can soak into the paper.)

Blending stumps that you can get at any art supply store.

Color a soft layer all over

blend in circular motion with stump and oil till you have a smooth finish!

Add more of same color to start to shade sides

Add little darker blue now and blend again

You could stop here. Light med and dark blue. Now watch.

I added purple to create depth. I blew out the brightness on the pencil so you could see the color I used

Add some reds and another layer of navy.


A little more navy and some blending. At this stage the surface is so smooth you don’t even need any more baby oil. you could pretty much just use the plain stump after the second layer.

Thanks for this Roberta, I for one will find it very useful.
xx

Tuesday, August 10, 2010

Emergency Measures while we are locked out of Craftbubble

While we're having trouble at Craftbubble we're going to post on our bloggy. We hate not being able to chat to you all so please post your chat here. Hopefully CB will be back to normal soon but in the meantime we'll take emergency measures.

Lx

Sunday, August 8, 2010

Using Lyra watercolours.

Some of you have been asking about lyras, so here's a little something to wet your appetites! Pardon the pun!
To get started you will need:
Lyra watercolours ( I got mine form Joanna Sheen)
Waterbrush or ordinary paintbrush. ( I prefer to use a koi waterbrush)
An old acrylic block
Kitchen roll
Water in your brush and an image to paint!

When you open the tin, they look like this. They look like wax crayons and have a creamy texture when you scribble with them!
.

Start with you lightest colours first and scribble your chosen colours on to your acrylic block
Take your water brush and mix the paint gently to get the colour you want. I started with a skin tone, but have to say that you can't beat Promarkers or copics for skin tones!


Wipe your brush in between colours on kitchen roll, or the back of your hand if you prefer! Just to remove the previous colour!
 I add darker colour from my acrylic block, to my brush, then on to the image as I feel I can control how much colour I add to my image this way, but it's up to you.  You can take the colour straight from the crayon but it's much darker, so always test on a scrap of paper first. I paint around the outside of the image first, then draw the colour in with the water brush.
 Continue, until you are happy with how the image looks.
The colours are more vibrant in real life.  Sadly the camera never does justice to them!

Saturday, August 7, 2010

Outside the Frame with Kate.

This tutorial is from one of my DT girls, Kate, over on I ♥ ProMarkers. Kate says she can't take all the credit for this tutorial as she saw it elsewhere, but this is her version. I'm sure lots of you will find this very useful, I know I certainly will.

Firstly lay your nestie on top of your image where you want it to cut .
Draw lightly around the inner edge of your die up to where the overlapping part of your image will be.
Remove your die . cut around the part that you want to overlap . On this image it is the bottom of her dress .Cut up just past your pencil lines to allow for the edge of the die .
Now put your die back in place , lining it up carefully with your pencil marks, bring the overlap part of your image through the die so that it sits on top of the die instead of under it . this is why you had to cut beyond your pencil lines .
Put back through your machine , securing with low tack tape .
Now you can rub out your pencil lines and mount again on another layer if you wish.

Briliant Kate, thanks so much! Why not pop over to Kates BLOG and see some of her lovely work.

Tuesday, August 3, 2010

Using a Brayer, Technique 1, with Clare

I recently acquired a speedball brayer after watching Barbara Gray from Clarity Stamps on Create and Craft and being inspired! So I can’t take credit for this technique but thought it was a perfect way of creating a snow scene or star night sky.

To get the best effect when using a brayer glossy card stock is a must have, along with dye based inkpads.

Step 1: Sprinkle a small amount of UTEE (Ultra Thick Embossing Enamel) onto your glossy cardstock

Step 2: Ink up your brayer thoroughly.

Step 3: Brayer over your UTEE and cardstock to create your snowy or starry effect!

Step 4: Leave the cardstock to dry and then lightly brush off the remaining UTEE. Make sure that you wash your brayer off properly removing all the particles.

Step 5: Create your project. I have used this technique on the background of my Christmas card and just ripped out a paper mask which I added before brayering to create the snowy hillside.

I also cut up a piece of brayered cardstock to make ATC’s (Artist Trading Cards). These were stamped onto using little letters to create the poem, some cute fairy images were coloured/cut out and glued on, along with some pearly gems to finish off my first series of ATC’s.

There are sure to be more techniques to follow so keep an eye out for more posts on the Craft Mad blog, why not dig your brayer out and get messy!


Thanks Clare. HERE'S Clares blog if you'd like to see more of her lovely work.

Monday, August 2, 2010

Paper Piecing with Julie

JULIE has kindly given us this Paper Piecing tutorial to share with you all.
Hi everyone, I'm going to go through paper-piecing with you in pics. Hopefully it'll help those of you who haven't tried this before. There are different ways of doing this technique, but I'm just going to show the way I do it.


Firstly, choose the papers you are going to use and the image. Make sure that the image is easy to cut out. I'm using BasicGrey Origins and a stamp by Mabel Lucie Attwell. I use the same paper for paper piecing that I'm going to use in the background, as I think it makes the paper piecing 'pop' more.


Stamp your main image first, then ink up your stamp again and stamp on the other papers. You don't need to restamp the whole image, only the bits you're going to be using. (I only need the umbrella and shoes on the darker paper so I haven't worried about the top of the image).


Next, cut out the pieces, try not to undercut them or they won't cover your image.


Colour the parts of the image that aren't going to be paper pieced like the skin.


To get dimension, turn the piece over and use an embossing tool round the edges on a mat to make the image curl in a little.


Add the first layer to the image. I've flattened the sleeves but given the coat some 'lift' with silicone glue. (it's better to use a wet glue as you can move it around to get it in exactly the right place).


Then add the other pieces. I've made the shoes flat, but the umbrella is curled round as an umbrella would be.


I've added black diamond Stickles to the umbrella and socks to make them stand out a bit more. Put aside to dry while you put your card together. Once dry, add to card. See finished card below.


That's all there is to it!

Thanks for this Julie
xx

Embossing Paste & Brass Stencils with Karen

I love this technique and used it for alot of my Christmas cards last year. Hope you enjoy it too.
Here's what you need.
Craft mat
Piece of card
Embossing PasteBrass Stencil
Pallet Knife
Glitter
Masking TapePlace the stencil on top of your card and tape the stencil to your craft mat on all 4 sides, using the masking tape. I like to tape it to the mat so it can't move around when applying the paste, you can tape it to just the card.Using the pallet knife take some embossing paste, I prefer to use the back of the knife for this.Spread the paste over the stencil.Remove all the excess paste, you see the paste stays in the holes in the stencil.Carefully remove the masking tape from 3 sides of the stencil, make sure you don't move the stencil or you'll smudge the embossing paste!Take hold of the bottom edge of the stencil and carefully lift it towards the taped edge of the stencil, a bit like turning the page of a book. Undo the last piece of tape and clean your stencil straight away in soapy water.Place your embossed card onto a piece of scrap paper, being careful not to catch the embossing paste as you move it around.Now take your glitter and sprinkle it over the embossing paste, giving it a good covering. You can use more than one colour glitter, just add one at a time, making sure to remove the excess before changing colours.Remove the excess glitter to reveal your finished stencilled image. Leave to dry for 24 hours then mount onto your card.
You can colour the embossing paste with acrylic paints, then you don't need to use glitter, I've done this too and it's just as effective, but the glitter is great for your Christmas cards.
ENJOY!